Building a little robot
I was inspired Mario Zechner’s Pibot. A robot he built by reverse engineering a kid’s toy and then equipped it with an LLM.
As a kid I took a robotics class once, and I loved it. Not sure why I didn’t explore robotics much in my undergrad. You could say reading Mario’s blog kind of reignited the fire in my heart. I looked online to see if there was a similar toy I could grab and reverse engineer and it turned out there was. It’s called Tobbie II and it was available at a nearby electronics store where I lived so I went in and bought it.
Hacking it together
I had to assemble the body myself, it was kind of like building Lego. Now I know this is meant to be for 8 year olds but some of these parts required serious muscle to shove together.
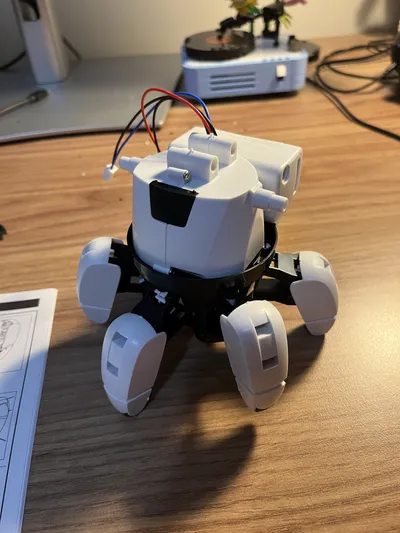
The robot consists of 2 DC motors that connect to a PCB which comes with a dual H-bridge for driving the motors. The PCB itself is not programmable. Rather, it gets signals from a proprietary board called the micro:bit. The toy didn’t come with the micro:bit, it was sold separately.
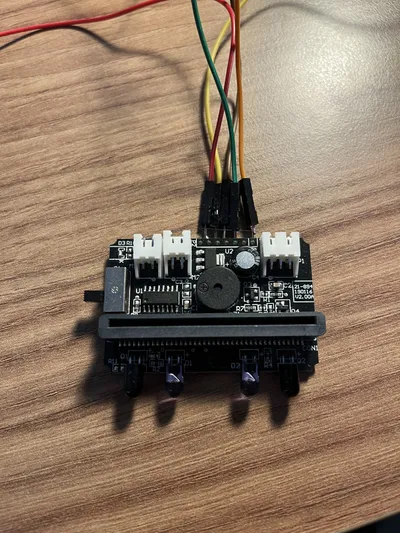
Didn’t matter anyway, because I wasn’t planning on using it. I bought an ESP8266, a board that has Wifi connectivity and 4MB of flash memory. My plan was to turn the ESP board into a HTTP server that accepts commands to move the robot, and directly communicates with the PCB’s GPIO pins to handle motor activation. To do this, I had to figure out which pins correspond to which motors and solder wires going from those pins to the ESP board’s pins. Finding the voltage pin was easy (it was labelled on the board), but I had absolutely no luck figuring out the motor pins on the PCB. Might just be a skill issue, but trying to continuity test the pins with a multimeter was so finicky that I thought it was not worth it, though I managed to make 2 of them beep. I made a hail mary soldering attempt picking what pins I thought would move the motors. This did not work.
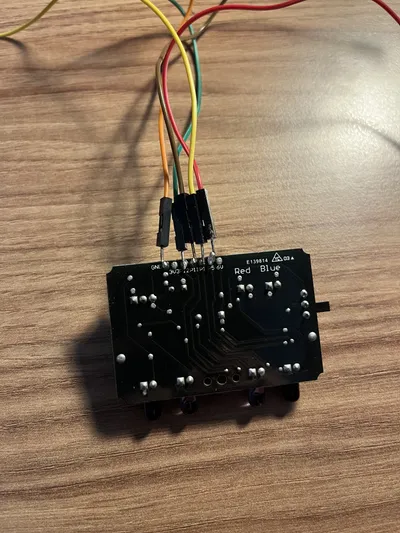
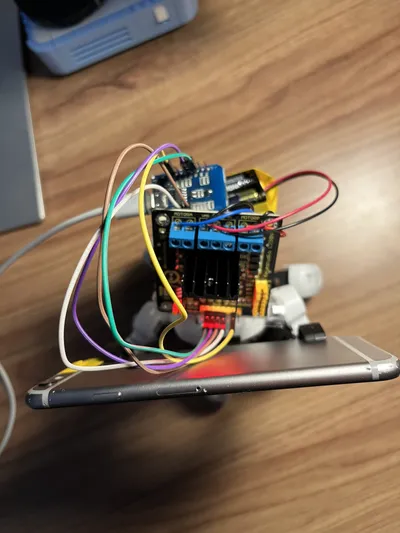
Refusing defeat, I went ahead and decided to just buy my own L298N dual H-bridge motor driver. I cut the connectors from the wires of the robot’s batteries and dc motors and connected them directly to my own motor driver. Connecting that driver to the ESP8266 was then trivial, I just used female jumper wires and didn’t even need to solder.
The motor driver board was a little too big though, so I couldn’t fit it in the robot’s head, where the original PCB and micro:bit would fit. The battery compartment was also meant to go inside the head, but with no head, I had to sticky tape it to the back of the robot.
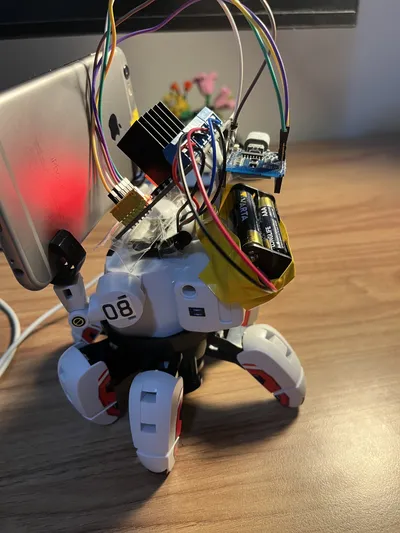
Thankfully this did not mess with the robot’s centre of gravity much, so it could still move and balance fine. I then sticky taped the ESP8266 on the robot too, and sticky taped the motor board to where the robot’s head would have been. I found some little battery packaging that served as a makeshift “slot” for the motor board to lock into, keeping it in place.
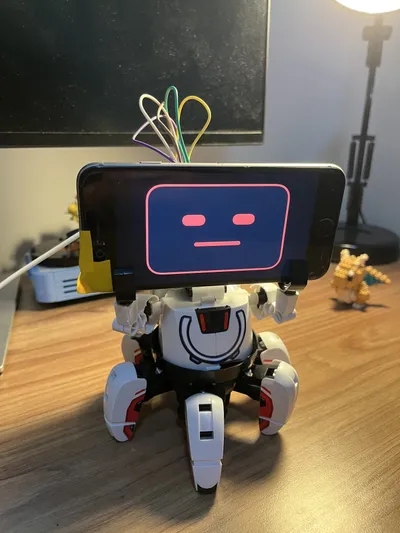
Now to make the robot useful, I needed a way to get video/audio input from it and then respond to those events. The robot didn’t come with anything like that. I also didn’t really want to buy sensors, as I wouldn’t be sure where to stick them to be honest, I was running out of room on the robot. And then it struck me. The robots hands, that were purely cosmetic, could actually hold a smartphone pretty well (refer to the image below). I was lucky to find a very old iPhone 6 available. Coincidentally, this iPhone is super lightweight so it doesn’t add much more weight to the robot and it can still move just fine.
Software stuff
I worked with Codex to write a short Swift program that I loaded on the iPhone through XCode.
Sidenote: iPhone 6 only goes up to ios 12 so I had to download an older version of XCode to build the code.
The swift app just streams the front camera and microphone feeds to a separate FastAPI server served from my Mac (the stream of data would not fit in the tiny memory of the ESP board). It was kind of perfect, the phone also hides the ugly motor driver since I added a cute face overlay on the app so now our robot has a digital face.
Now to make things interesting, I’m going to let Codex drive the robot. How? Well The FastAPI server is not just any old HTTP server, it’s an MCP server. I bet you they didn’t anticipate this use case though.
We expose the following tools to Codex:
move_robot(moves: list[Move]) -> Image- Accepts an array of Enum values (either F, B, R, L for forward, backward, right, left). The server then runs these moves in sequence on the robot. The tool returns an image as its output that shows what the robot is looking at after moving.get_snapshot() -> Imagethat gets an image of what the robot is currently looking at.
With this setup, I was able to just ask Codex something like “go towards the drink bottle” and Codex would drive the robot to get there on my desk.
There’s still much to do with this robot, I have many plans, like adding speech-to-speech interactions using NVIDIA’s Parakeet, Liquid’s LFM2.5 for thinking/tool calling and Kokoro for TTS. But this has been a fun start. The code for everything can be found here.